Defining the Library
Your SendSites Library stores collateral for building Proposal pages. Each menu in the Library functions as a repository for the appropriate assets. These include images, videos and documents. Additionally, predefined content, such as Templates and Sections are stored in the Library.
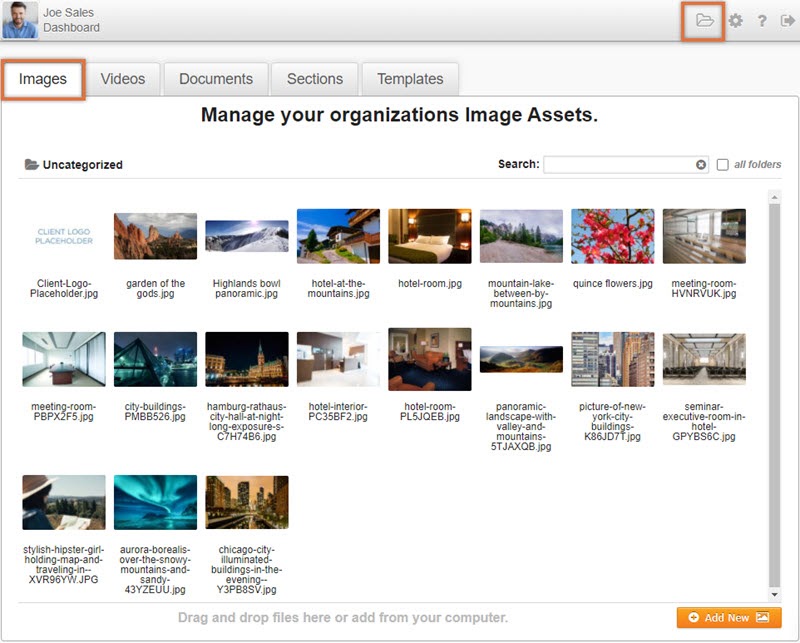
View and accessibility of the Library are limited based on the assigned User Role for each user. For additional information about managing users in the SendSites platform, read the Settings Overview article.
Images
The images menu stores all photo-related content. All assets displayed here are available for use within pages. The SendSites Library accepts and stores all common image file formats — JPEG, PNG, PSD, TIFF, GIF.
To upload files to your SendSites Images Library:
- Access the Images menu from the Library.
- On the next screen, use drag & drop or click “Add New”
 . You may select multiple images for upload. As images are added into the Library, a status indicator appears.

Managing Images
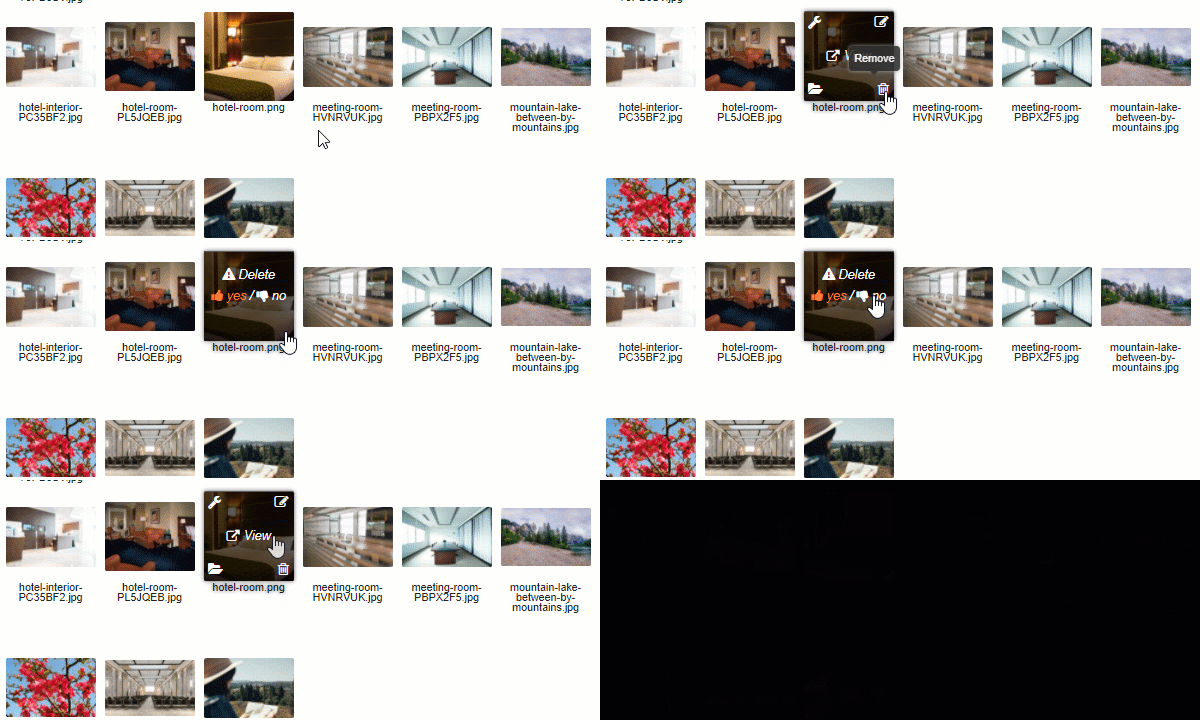
Multiple tools exist for assets within the Images menu. These options appear upon hovering your cursor over an image.

View
Clicking the ‘View’ ![]() button engages a new window, displaying the image in actual size.
button engages a new window, displaying the image in actual size.

Edit Image
Clicking the ‘Edit’ ![]() option displays an image editor tool.
option displays an image editor tool.

Note
Changes applied during edit mode are saved permanently and overwrite the original image.
Move to Folder
Click the ‘Move’ ![]() button to rearrange the image to a new folder.
button to rearrange the image to a new folder.
In the next window, navigate to the new destination folder for the selected image.
Click “Move Here” to apply the move of the image.

To create and relocate the image to a new folder, enter the new folder name after the “ / “ in the “Path” field. For example, in the image below, the selected image will be moved from the “Uncategorized” folder to a newly created folder titled “Meeting Space Images.”

Configure
The ‘Configure’ ![]() tool provides the ability to adjust the file name and description of an image. Image’s tags and the “share” setting of an image are controlled in this menu.
tool provides the ability to adjust the file name and description of an image. Image’s tags and the “share” setting of an image are controlled in this menu.
 |
NoteIf you have enabled the 'Share Image Assets' option in My Profile, the 'Shared' checkbox will be selected by default. 8. The user name of the person responsible for uploading the selected image. |
Remove
Use the ‘Remove’ ![]() button to permanently delete an asset from the Images Library. Confirm or cancel the delete by using the “Yes” or “No,” respectively.
button to permanently delete an asset from the Images Library. Confirm or cancel the delete by using the “Yes” or “No,” respectively.
Videos
The Videos menu displays links to recorded collateral. These videos are not uploaded to SendSites, rather any items displayed here are links out to resources stored on a Third Party provider. The Videos Library accepts links to various sites. Simply provide the Third Party embed or snippet URL.

To create Video links in your SendSites Videos Library:
- Access the Videos menu from the Library.
- On the next screen click the “Add New”
 button.
 - From here, provide the embed or snippet URL for your video and click Save.

Managing Videos
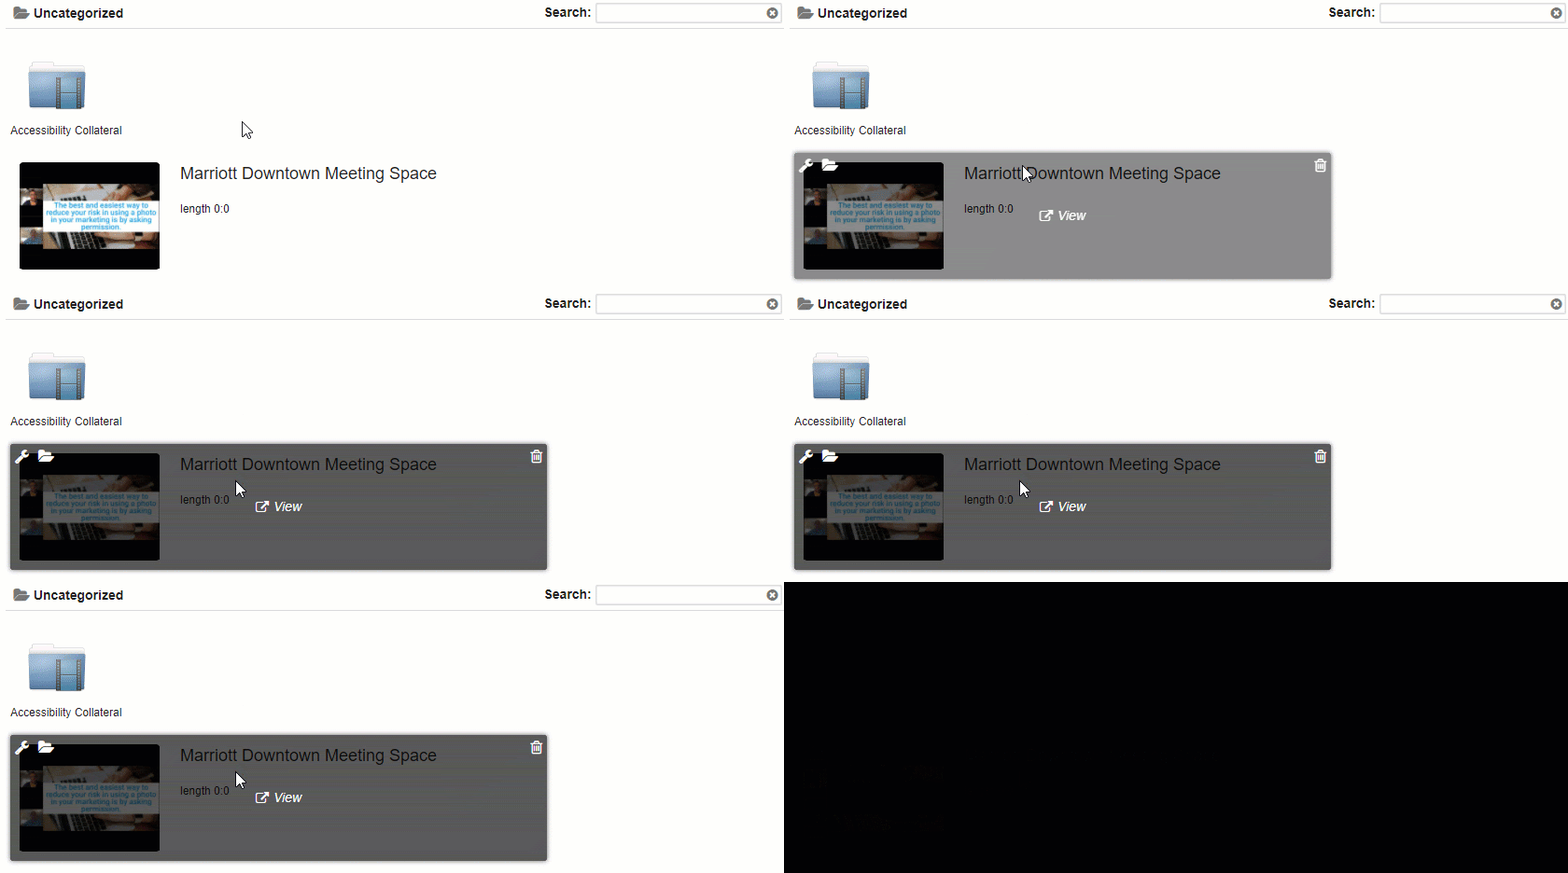
Videos are managed using options that appear upon hovering your cursor over a Video.
View
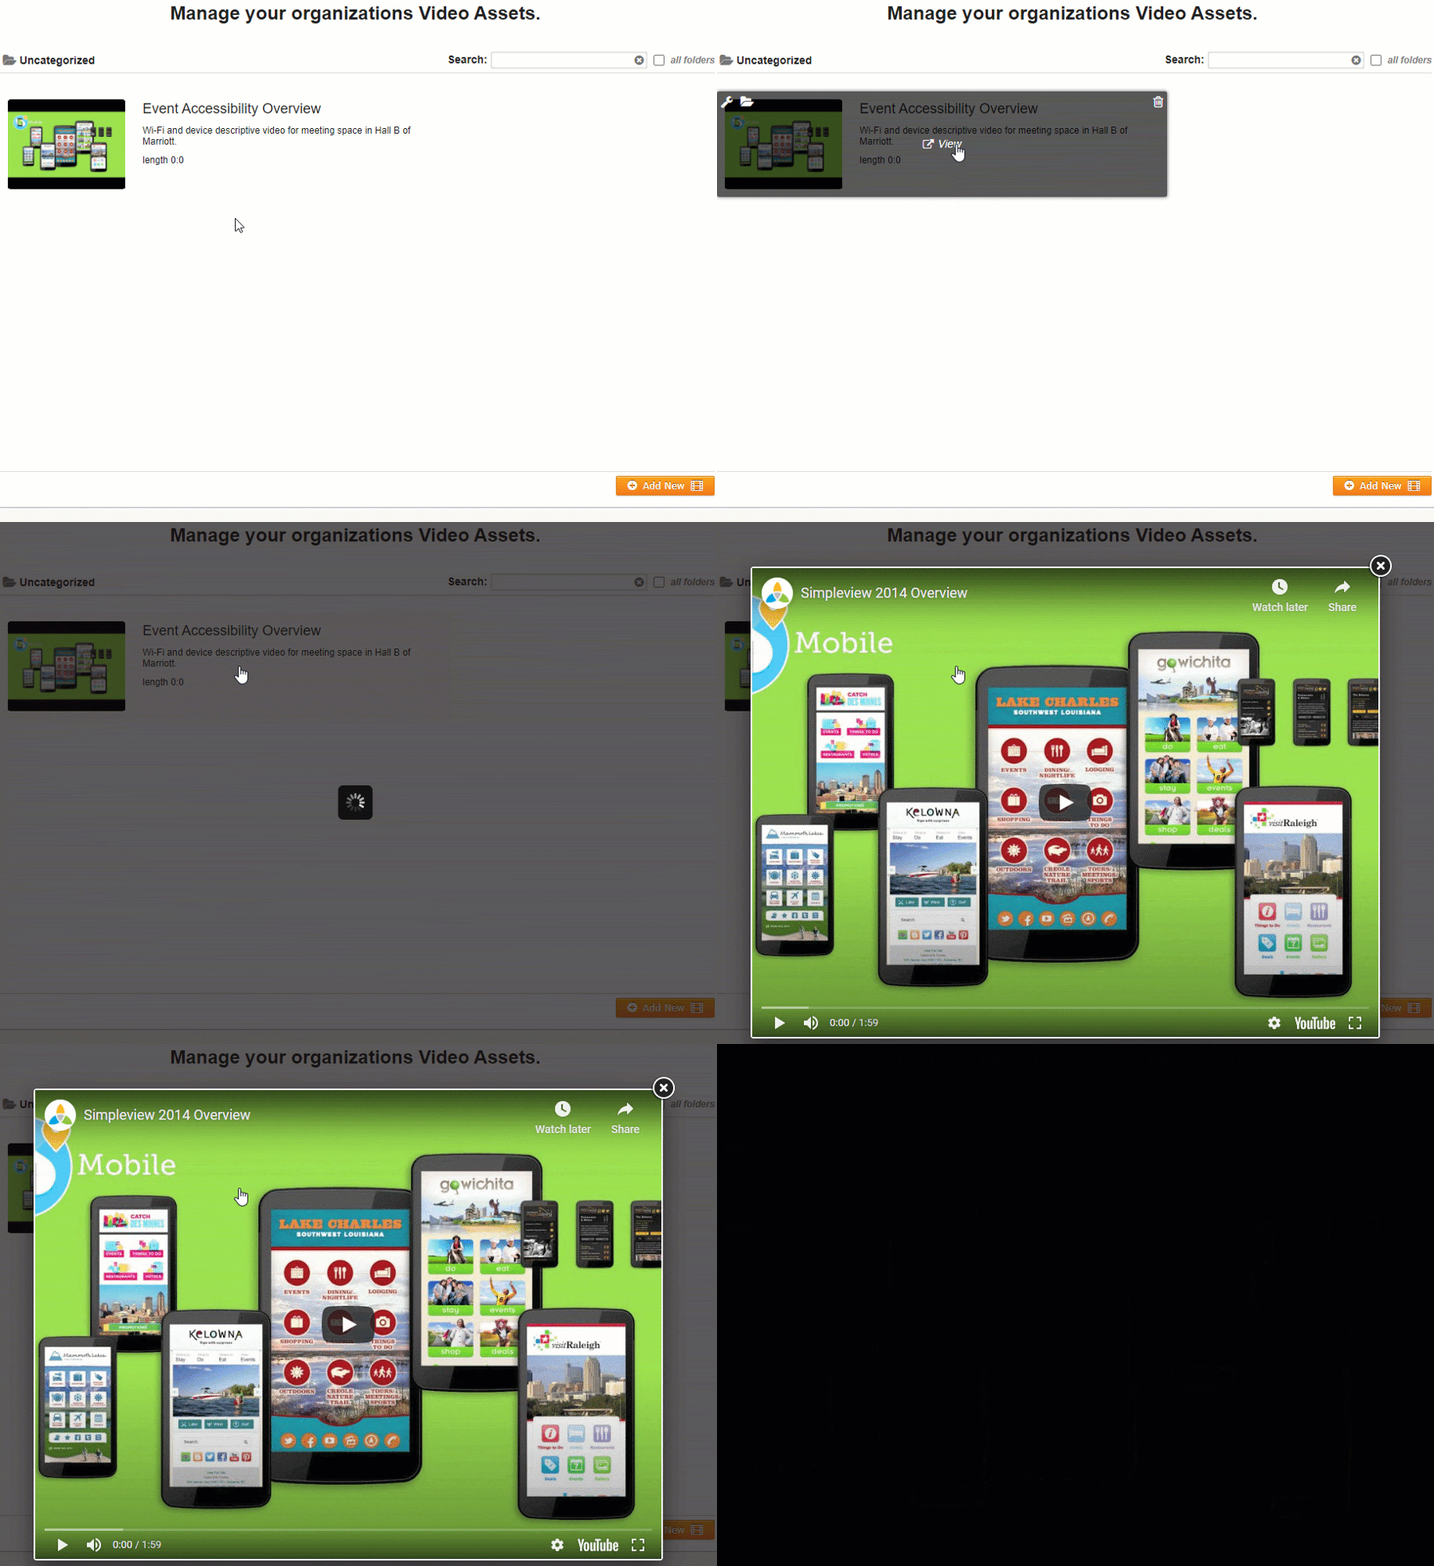
Clicking the ‘View’ ![]() button engages a new window. From here, you may play the video and view it as it will appear on your page.
button engages a new window. From here, you may play the video and view it as it will appear on your page.
Edit Properties
Clicking the ‘Edit’ ![]() option displays an image editing tool.
option displays an image editing tool.
 |
|
Move to Folder
Click the ‘Move’ ![]() button to relocate the video to a new folder.
button to relocate the video to a new folder.
In the next window, navigate to the new destination folder for the selected video.
Click “Move Here” to apply the move of the image.
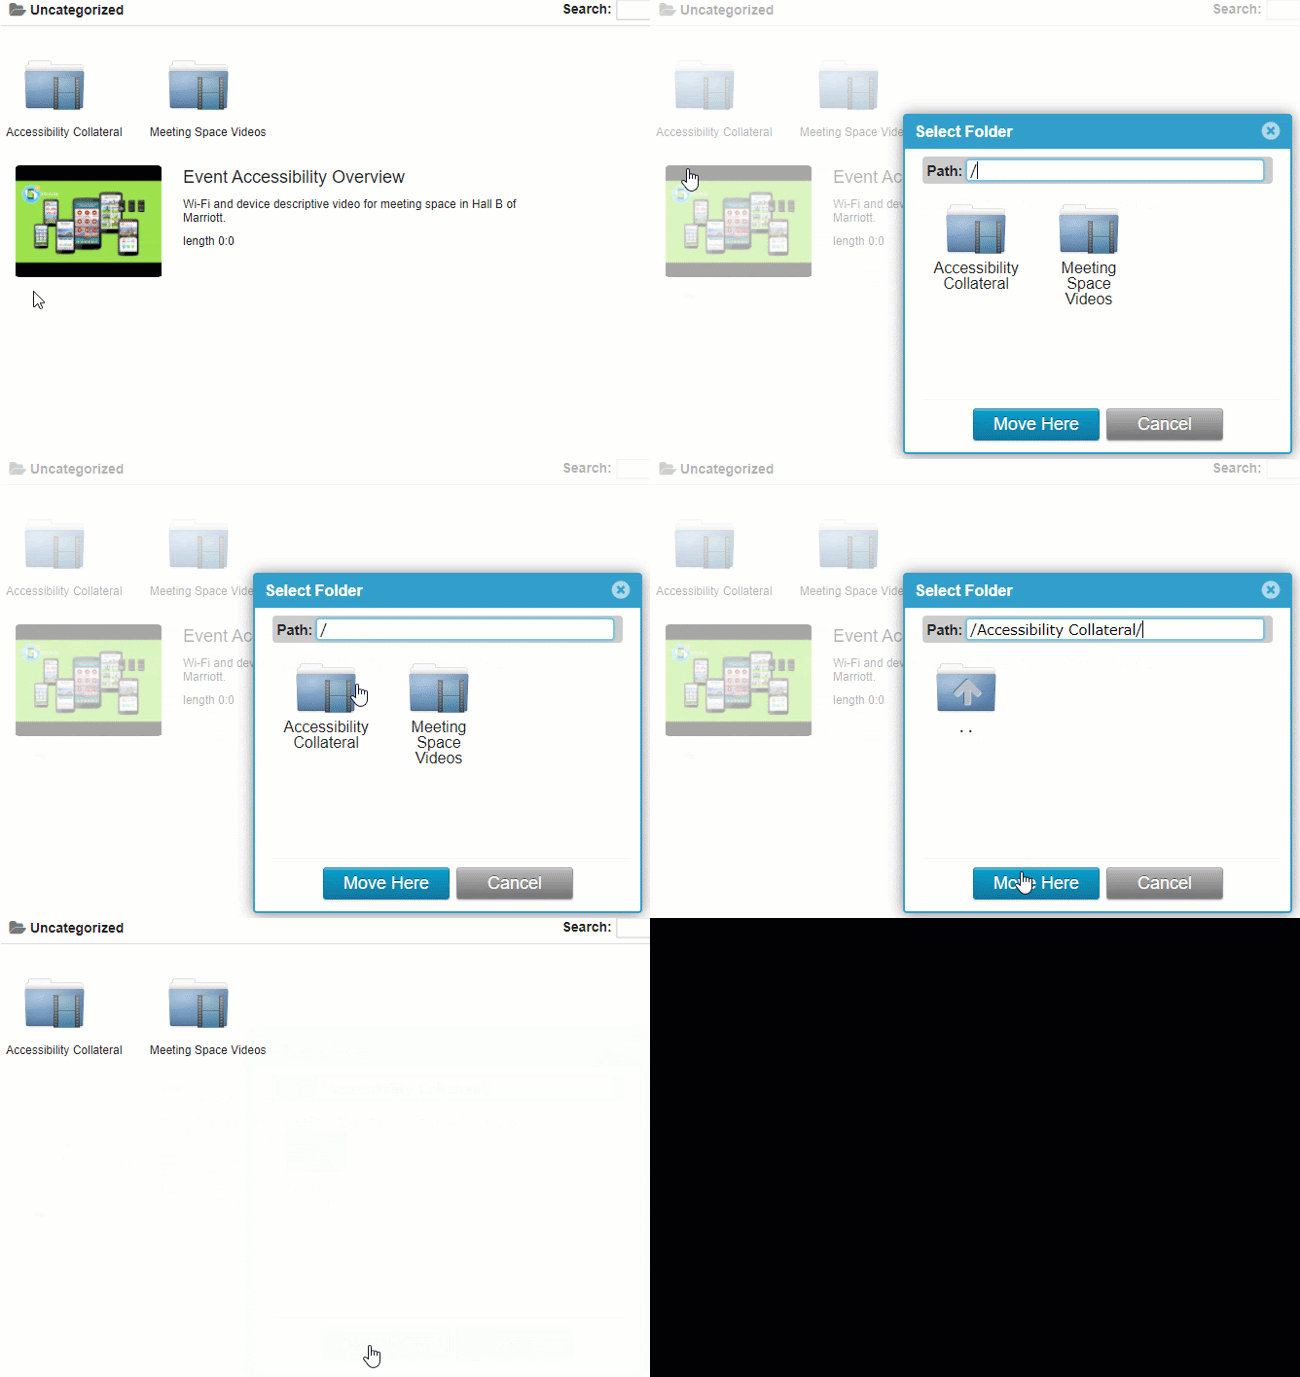
To create and relocate the video to a new folder, enter the new folder name after the “ / “ in the “Path” field. For example, in the image below, the selected image will be moved from the “Uncategorized” folder to a newly created folder titled “Meeting Space Videos.”

Remove
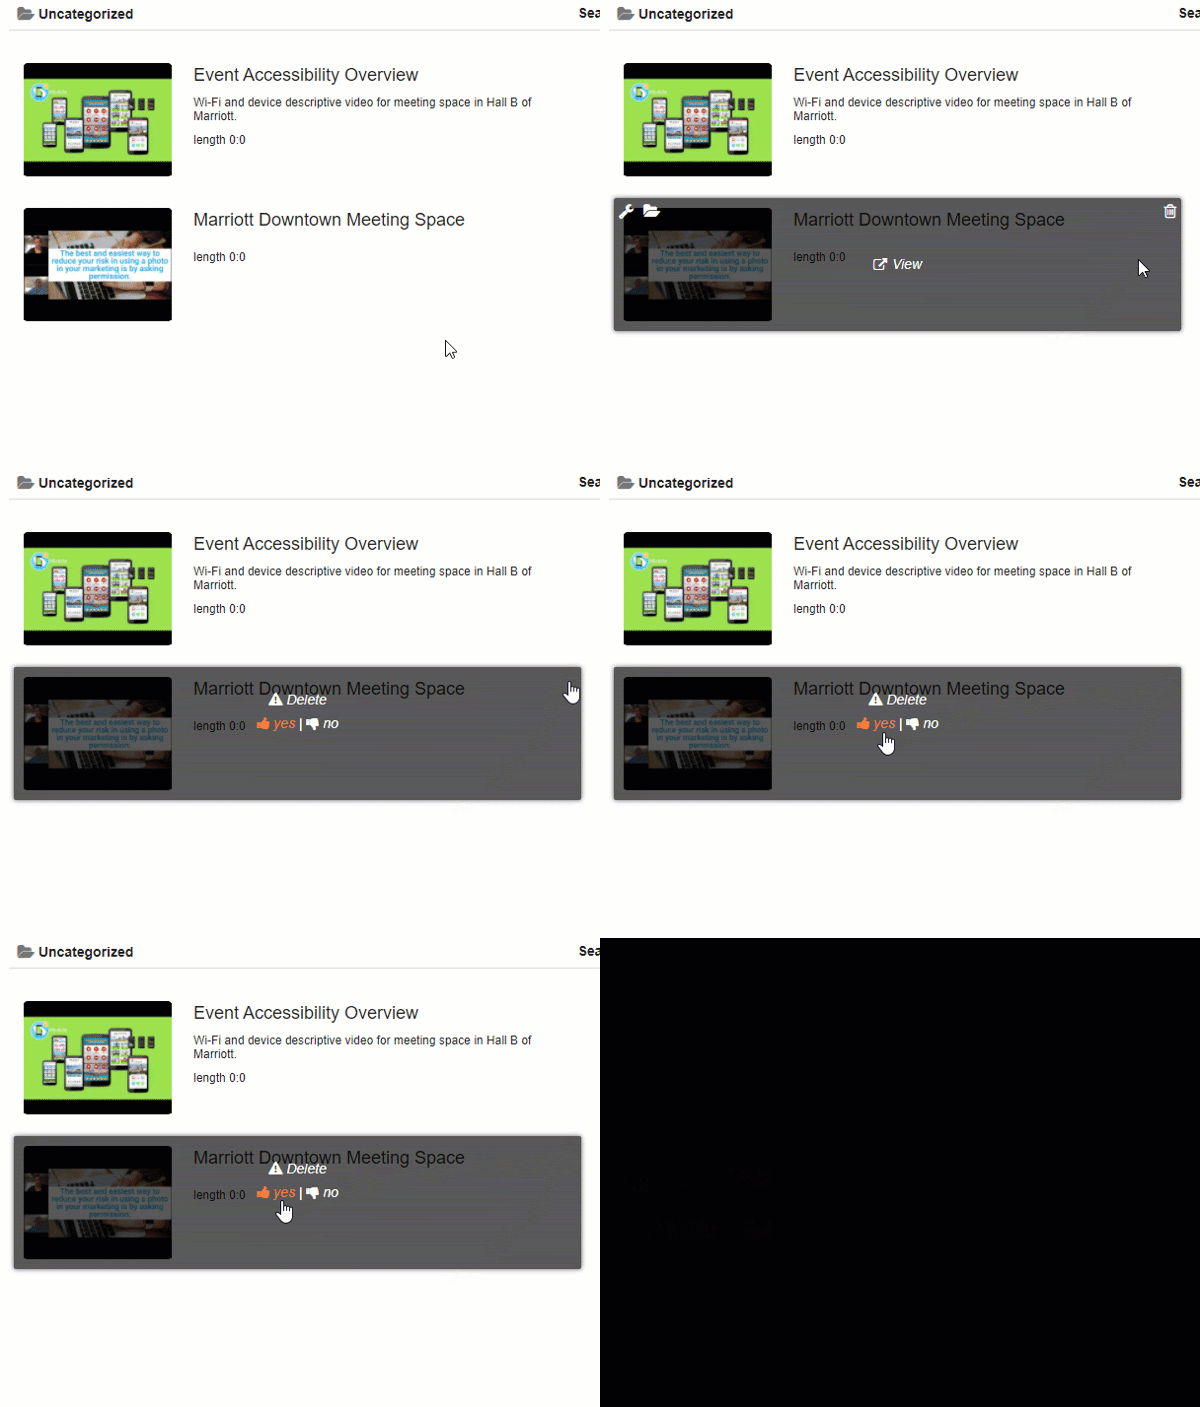
Use the ‘Remove’ ![]() button to permanently delete an asset from the Videos Library. Confirm or cancel the delete by using the “Yes” or “No,” respectively.
button to permanently delete an asset from the Videos Library. Confirm or cancel the delete by using the “Yes” or “No,” respectively.
Documents
The Documents menu displays links to uploaded readable collateral. All assets displayed here are available for use as downloadable attachments within Proposal pages. The SendSites Library accepts and stores all document file types.

To upload files to your SendSites Documents Library:
- Access the Documents menu from the Library.
- On the next screen, use drag & drop or click the “Add New”
 button. You may select multiple files for upload. As documents are added into the Library, a status indicator appears.

Managing Documents
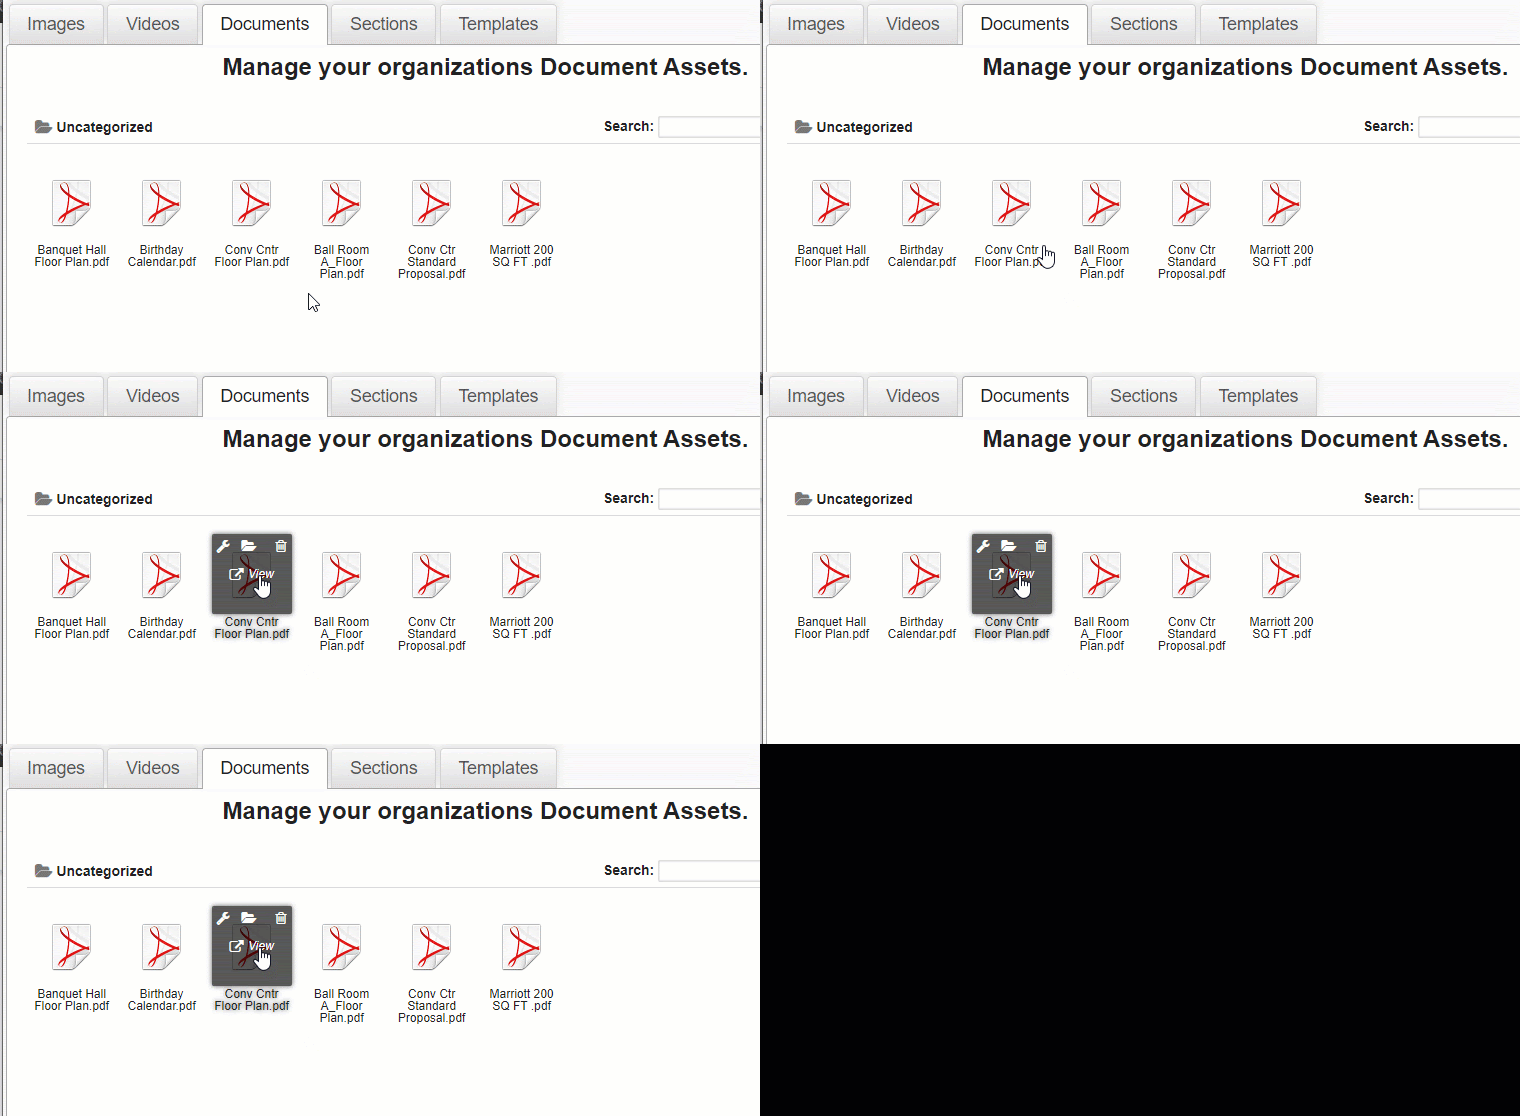
Documents are managed using options that appear upon hovering your cursor over a Document.
View
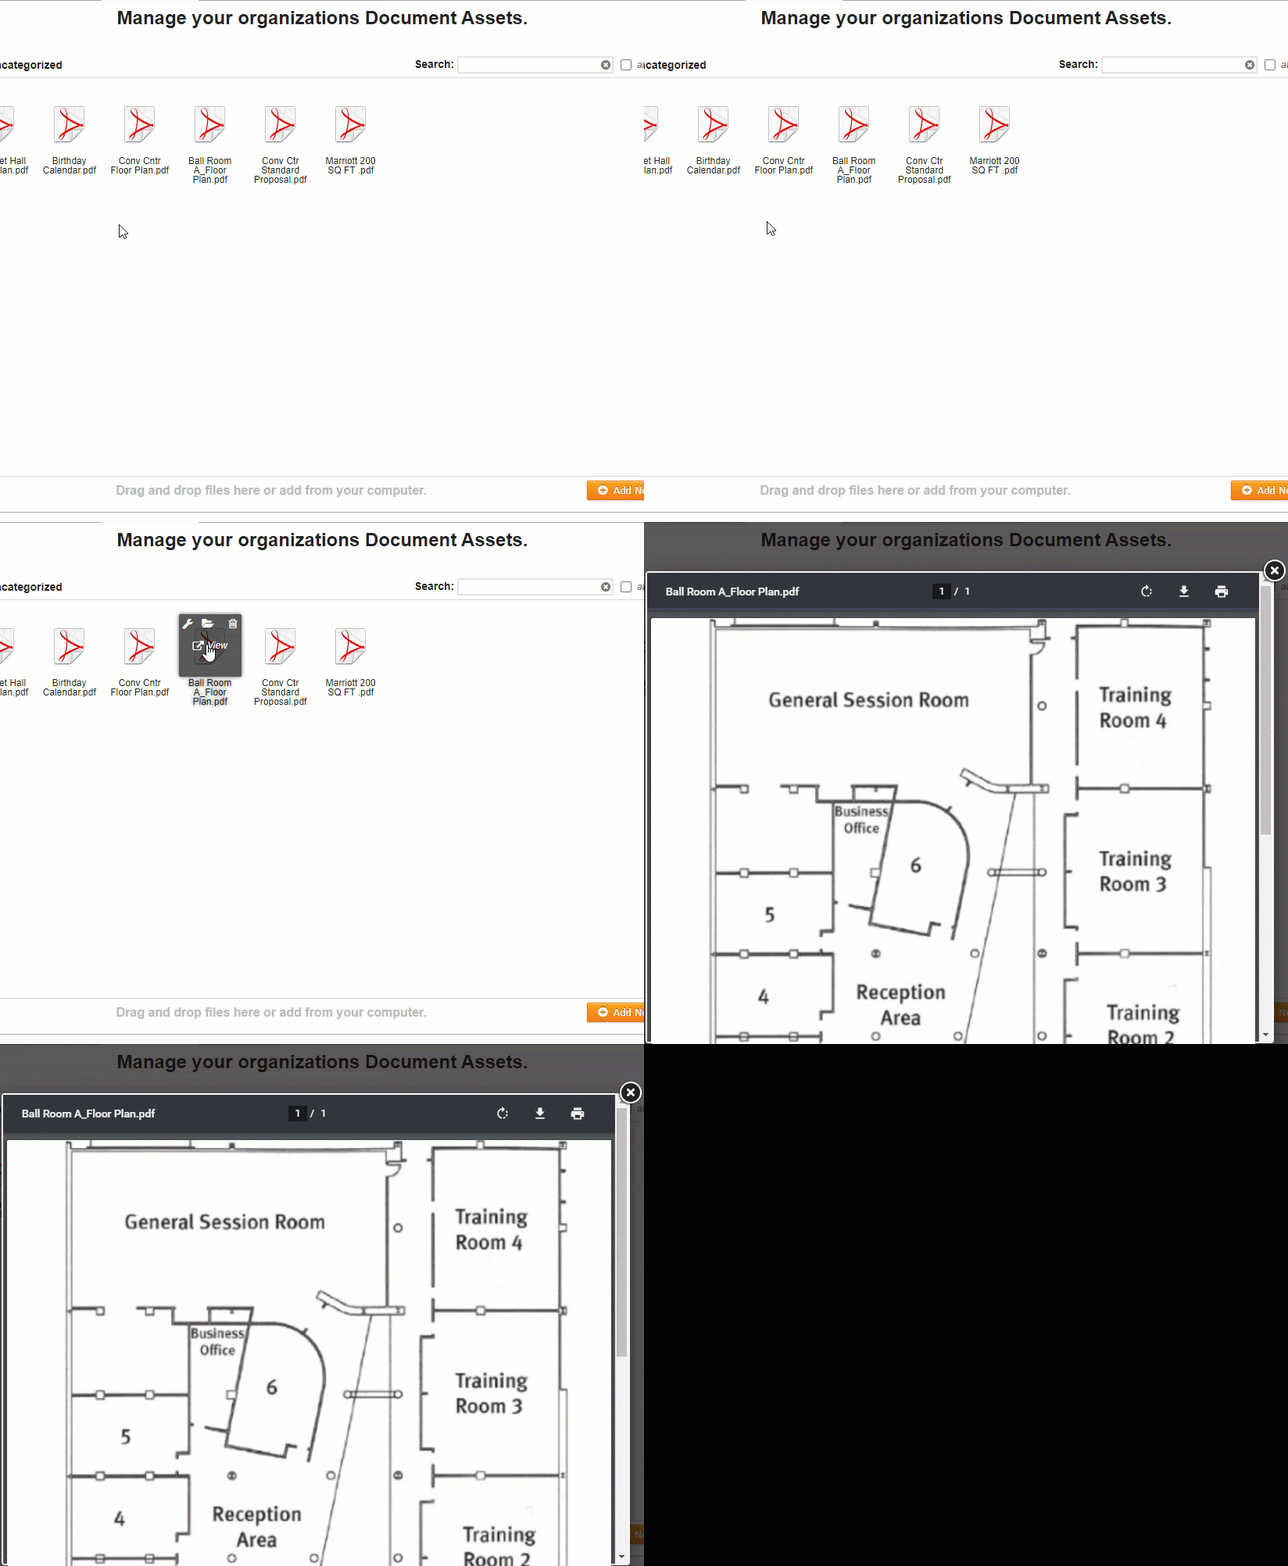
Clicking the ‘View’ ![]() button engages a new window, providing a preview of the full document.
button engages a new window, providing a preview of the full document.
Edit Properties
Clicking the ‘Edit’ ![]() option displays an image editing tool.
option displays an image editing tool.
 |
|
Move to Folder
Click the ‘Move’ ![]() button to relocate the document to a new folder.
button to relocate the document to a new folder.
In the next window, navigate to the new destination folder for the selected document.
Click “Move Here” to apply the move of the image.
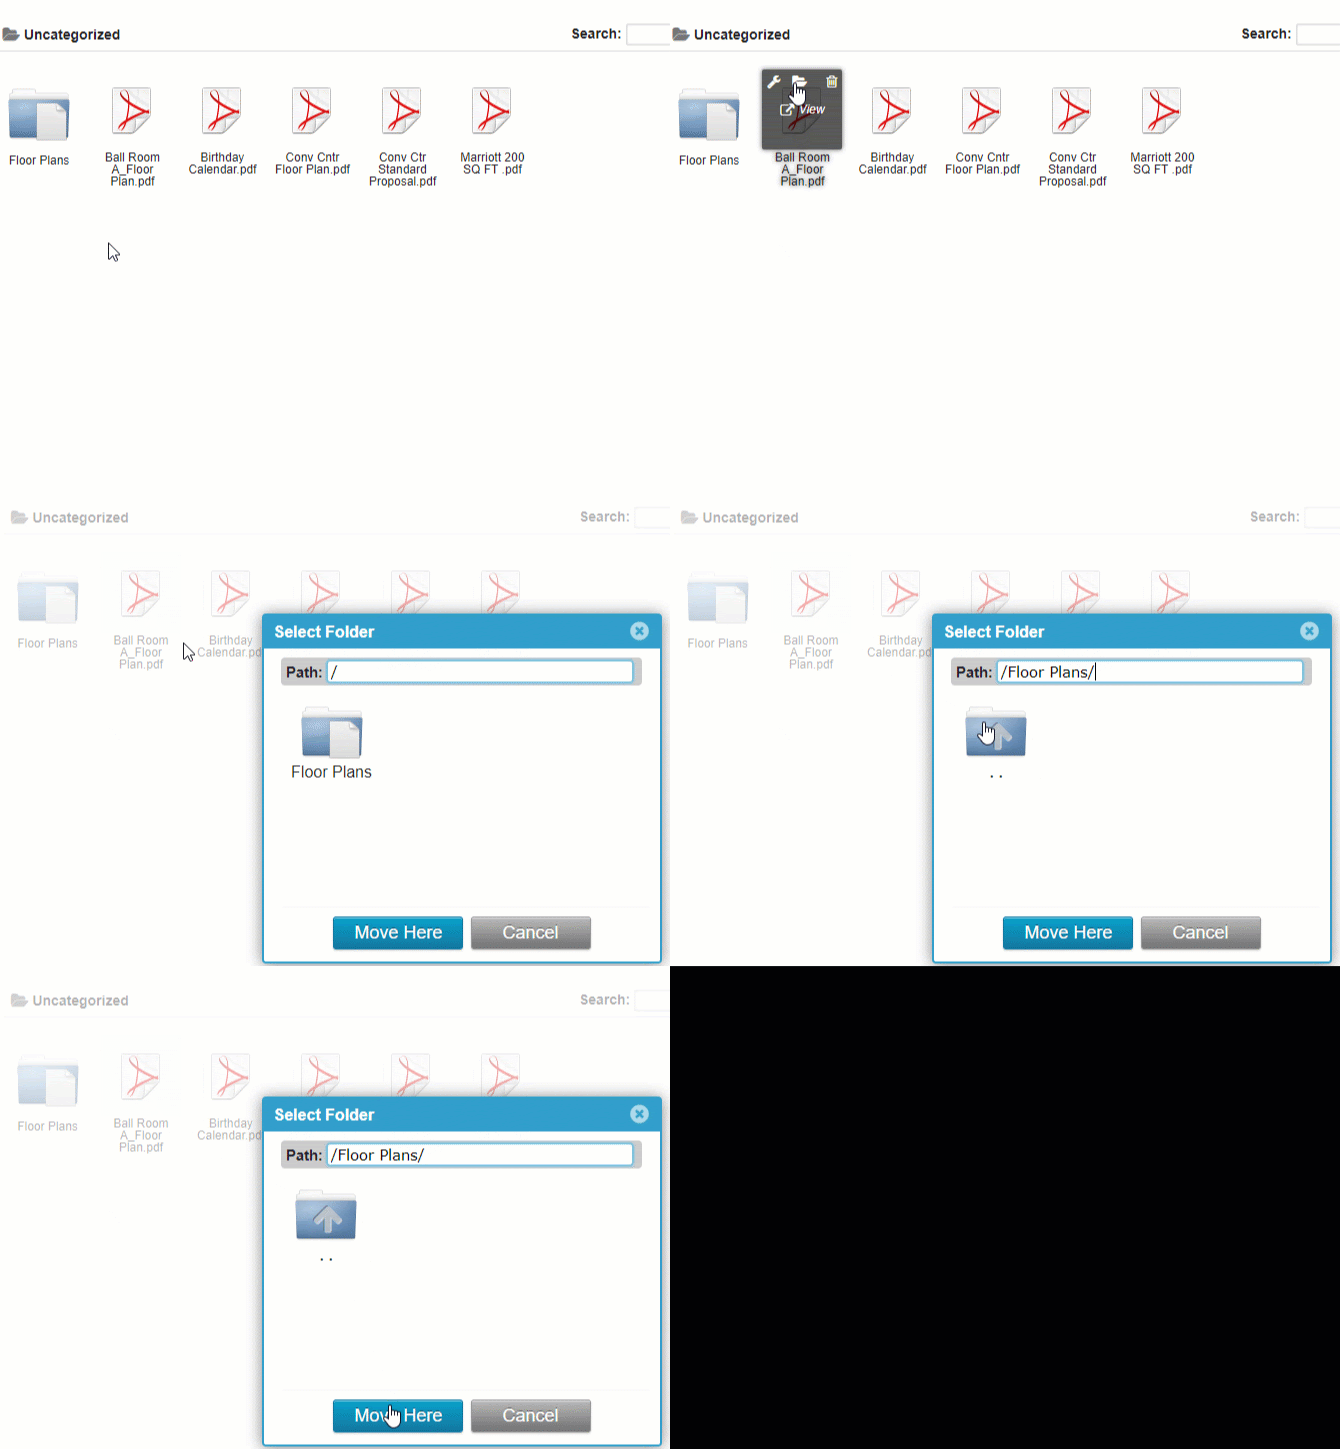
To create and relocate the document to a new folder, enter the new folder name after the “ / “ in the “Path” field. For example, in the image below, the selected image will be moved from the “Uncategorized” folder to a newly created folder titled “Meeting Space Documents.”

Remove
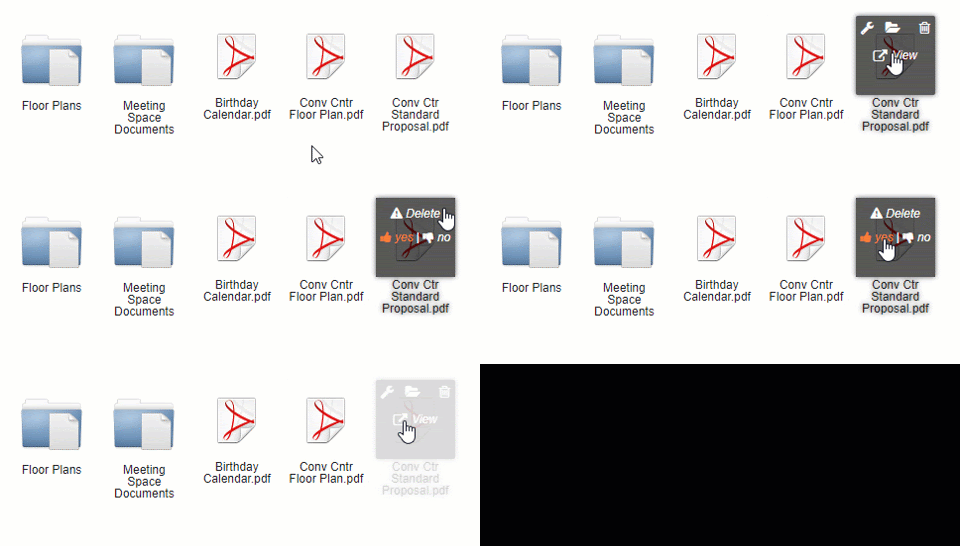
Use the ‘Remove’ ![]() button to permanently delete an asset from the Documents Library. Confirm or cancel the delete by using the “Yes” or “No,” respectively.
button to permanently delete an asset from the Documents Library. Confirm or cancel the delete by using the “Yes” or “No,” respectively.
Sections
The ‘Sections’ menu of the Library stores all Sections saved by the current user. This portion of the Library also displays Sections saved and shared to all SendSites users.
While this menu stores Sections, editing of the content of each is not available. Modifying and updating the structure of Sections is only available during the SendSites page building process.

Each item shown here is available for building pages when using the “Browse My Saved” and/or “Browse Company” features of the ‘Add a Section’ menu.

Refer to the Page Management article for details about saving Sections.
Managing Sections
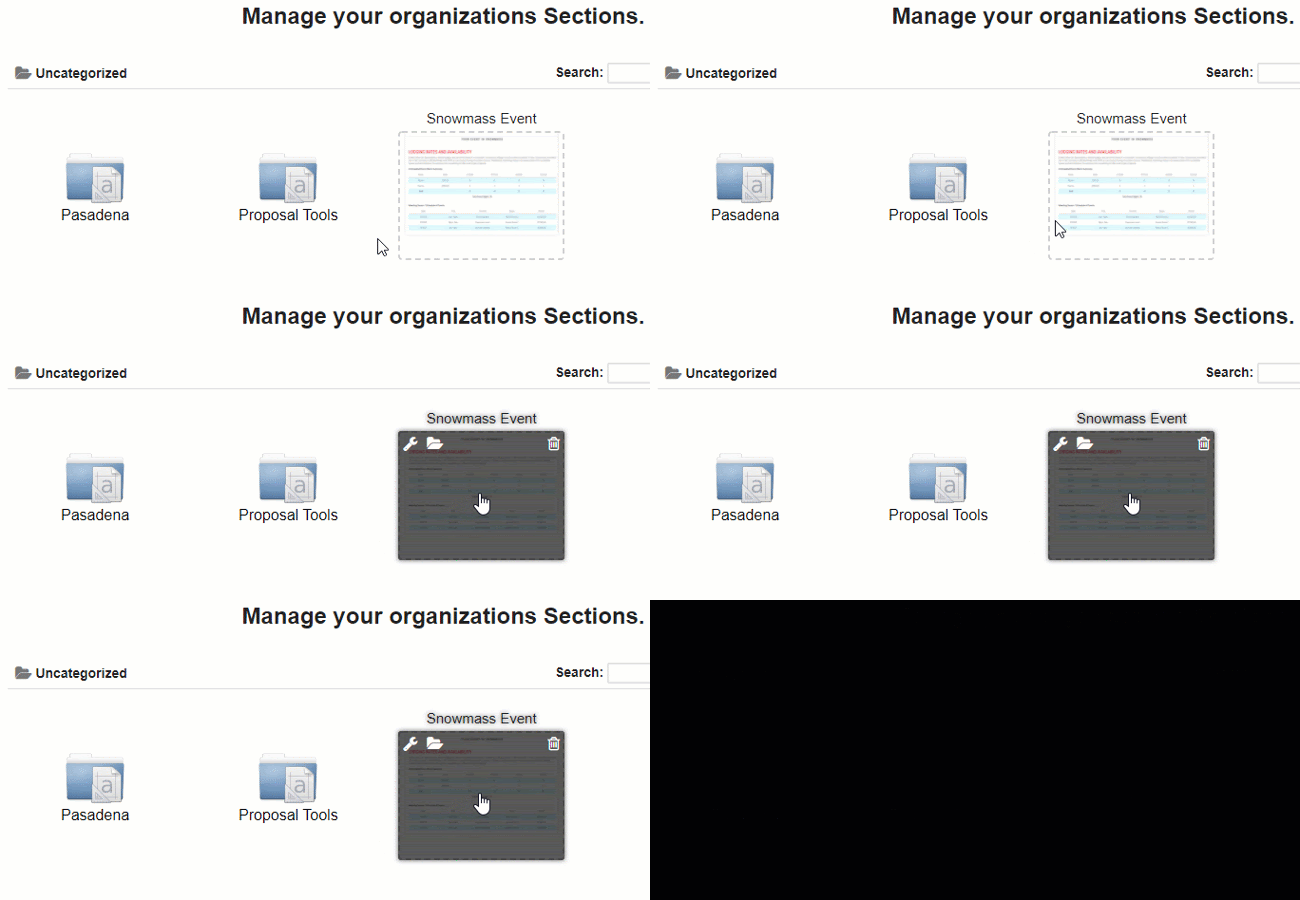
Sections are managed using options that appear upon hovering your cursor over a Saved Section.
Edit Properties
Clicking the ‘Edit’  option displays a Section editing tool.
 |
|
Move to Folder
Click the ‘Move’ ![]() button to relocate the Section to a new folder.
button to relocate the Section to a new folder.
In the next window, navigate to the new destination folder for the selected Section.
Click “Move Here” to apply the move of the Section.
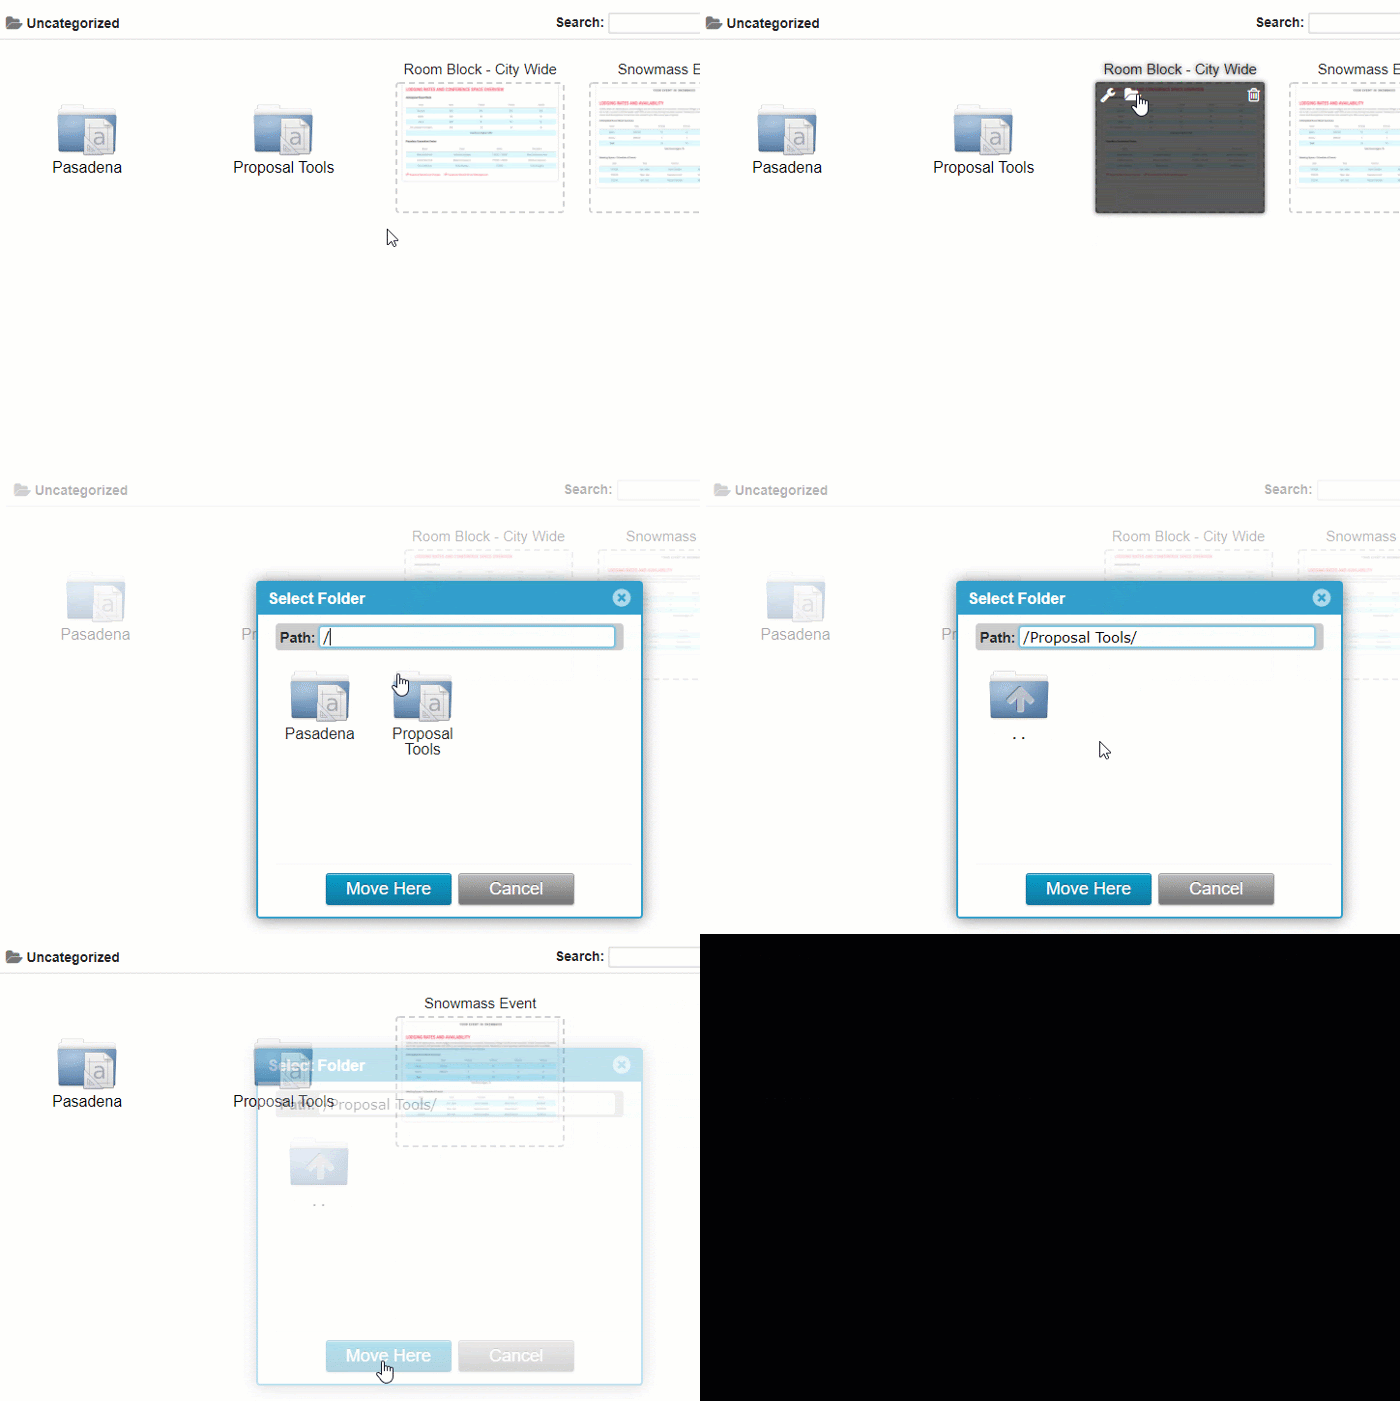
To create and relocate the Section to a new folder, enter the new folder name after the “ / “ in the “Path” field. For example, in the image below, the selected Section will be moved from the “Proposal Tools” folder to a newly created folder titled “City Wide Collateral.”

Remove
Use the ‘Remove’ ![]() button to permanently delete an asset from the Sections Library. Confirm or cancel the delete by using the “Yes” or “No,” respectively.
button to permanently delete an asset from the Sections Library. Confirm or cancel the delete by using the “Yes” or “No,” respectively.

Templates
The ‘Templates’ menu of the Library stores pre-formatted pages. Each Template serves as a guide for building pages with a specific design.
Editing the content of each Template is not available from this menu. Modifying and updating the structure of Templates is only available during the SendSites page building process.
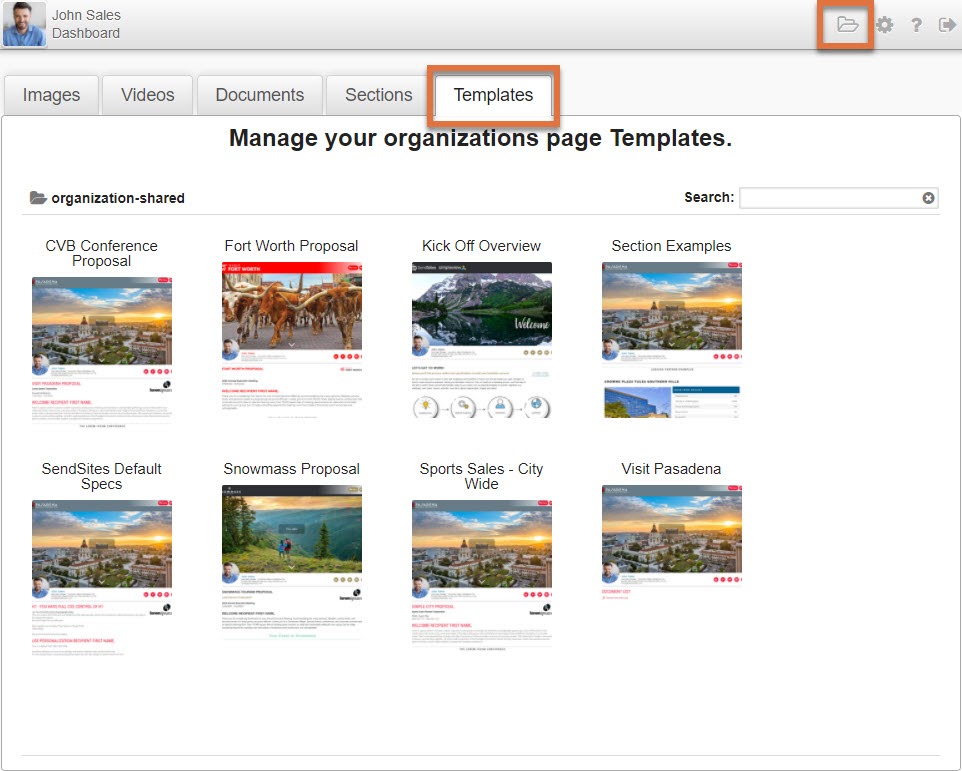
Templates stored in the Library appear as options when a user starts building a page. Refer to the Page Management article for details about creating page from a Template
Managing Templates
Templates are managed using options that appear upon hovering your cursor over a Template.
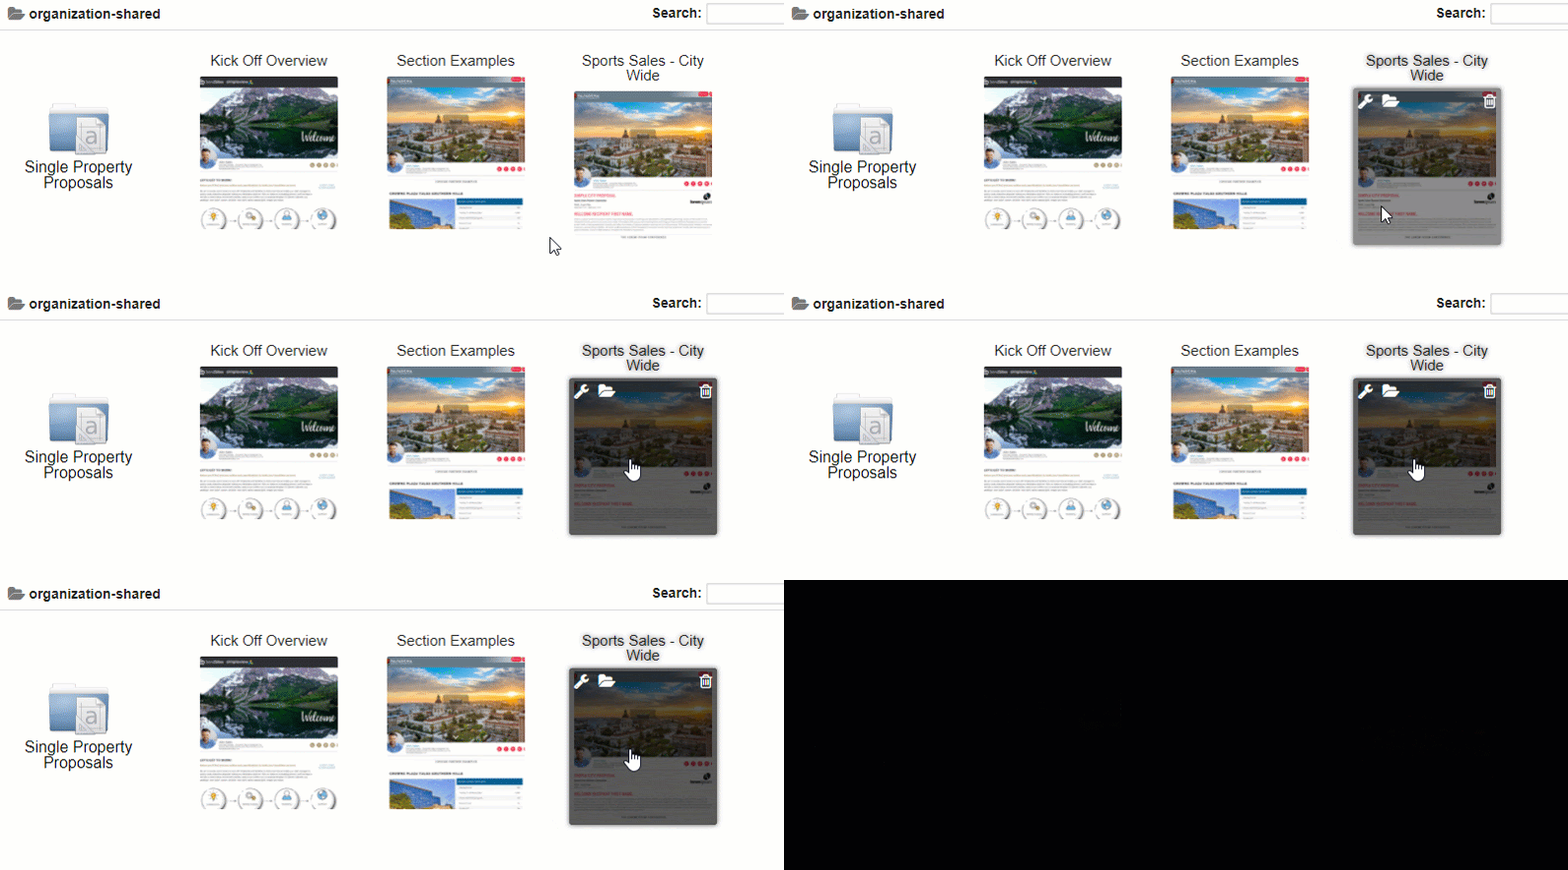
Edit Properties
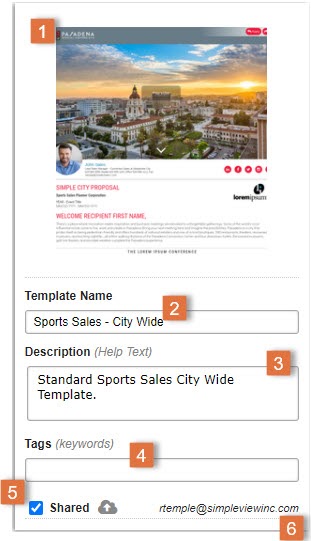
Clicking the ‘Edit’ ![]() option displays a Template editing tool.
option displays a Template editing tool.
 |
|
Move to Folder
Click the ‘Move’ ![]() button to relocate the Template to a new folder.
button to relocate the Template to a new folder.
In the next window, navigate to the new destination folder for the selected Template.
Click “Move Here” to apply the move of the Template.
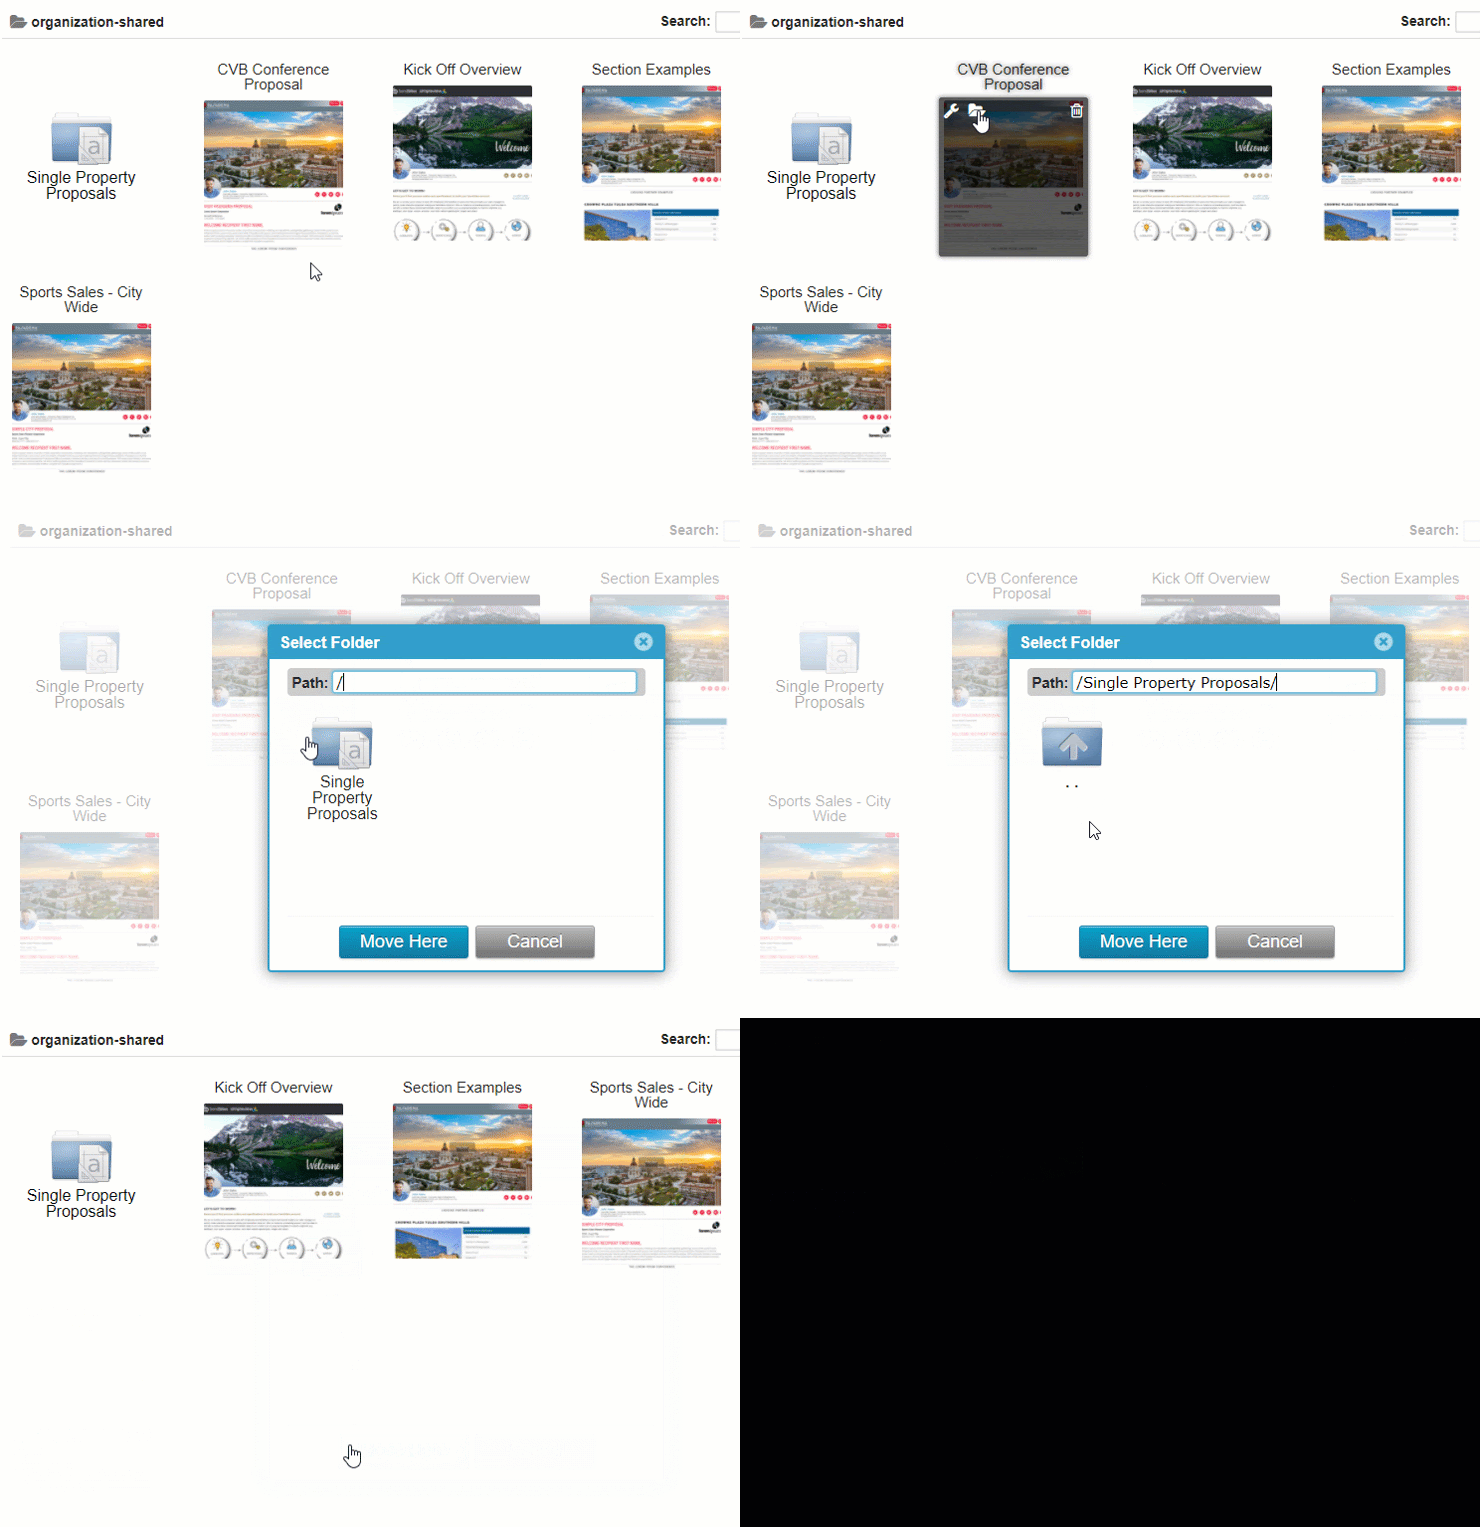
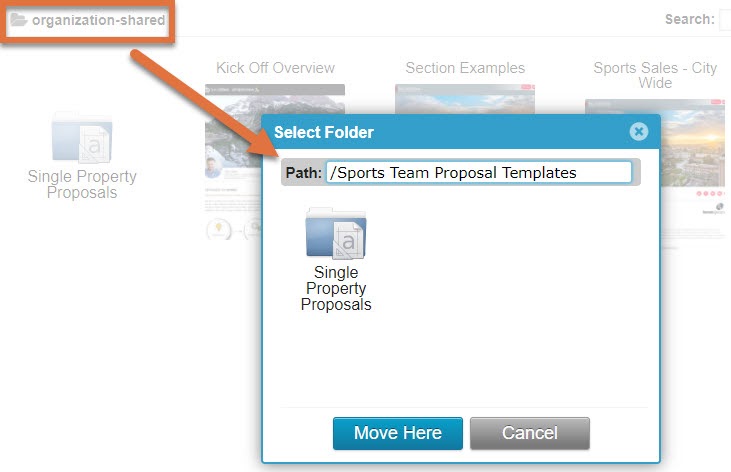
To create and relocate the Template to a new folder, enter the new folder name after the “ / “ in the “Path” field. For example, in the Template below, the selected Template will be moved from the “organization-shared” folder to a newly created folder titled “Sports Team Proposal Templates.”
Remove
Use the ‘Remove’ ![]() button to permanently delete an asset from the Templates Library. Confirm or cancel the delete by using the “Yes” or “No,” respectively.
button to permanently delete an asset from the Templates Library. Confirm or cancel the delete by using the “Yes” or “No,” respectively.
